


Nowadays everyone (including me) relies on social networks’ OAuth for faster authentication in websites, and is ridiculous the amount of providers out there, Facebook, Google, Microsoft and LinkedIn are the most popular ones (albeit there are others like Instagram and Amazon which are being used more and more), my target with this post is to show you guys how it works, neither by using any fancy library nor installing any special package, but by crafting everything by hands, which I believe is the best way to record something in your brain forever, of course, I will not give you a a bunch of theory that you are not going to enjoy (only the necessary), instead, lets get a hammer and chisel and craft something truly beautiful.
First of all, for all of you who doesn’t know what this is about, let’s see what Wikipedia has to say about the concept we will be dealing here:
OAuth is an open standard for access delegation, commonly used as a way for Internet users to grant websites or applications access to their information on other websites but without giving them the passwords. This mechanism is used by companies such as Amazon, Google, Facebook, Microsoft and Twitter to permit the users to share information about their accounts with third party applications or websites.
Now that you have an idea, let’s see a small graphic to illustrate what we want:

The graphic above represents the algorithm followed by any authentication process no matter which provider (in the graphic I mentioned Github but only as an example, that could be anyone), below I will give a brief explanation of what happens on each step.
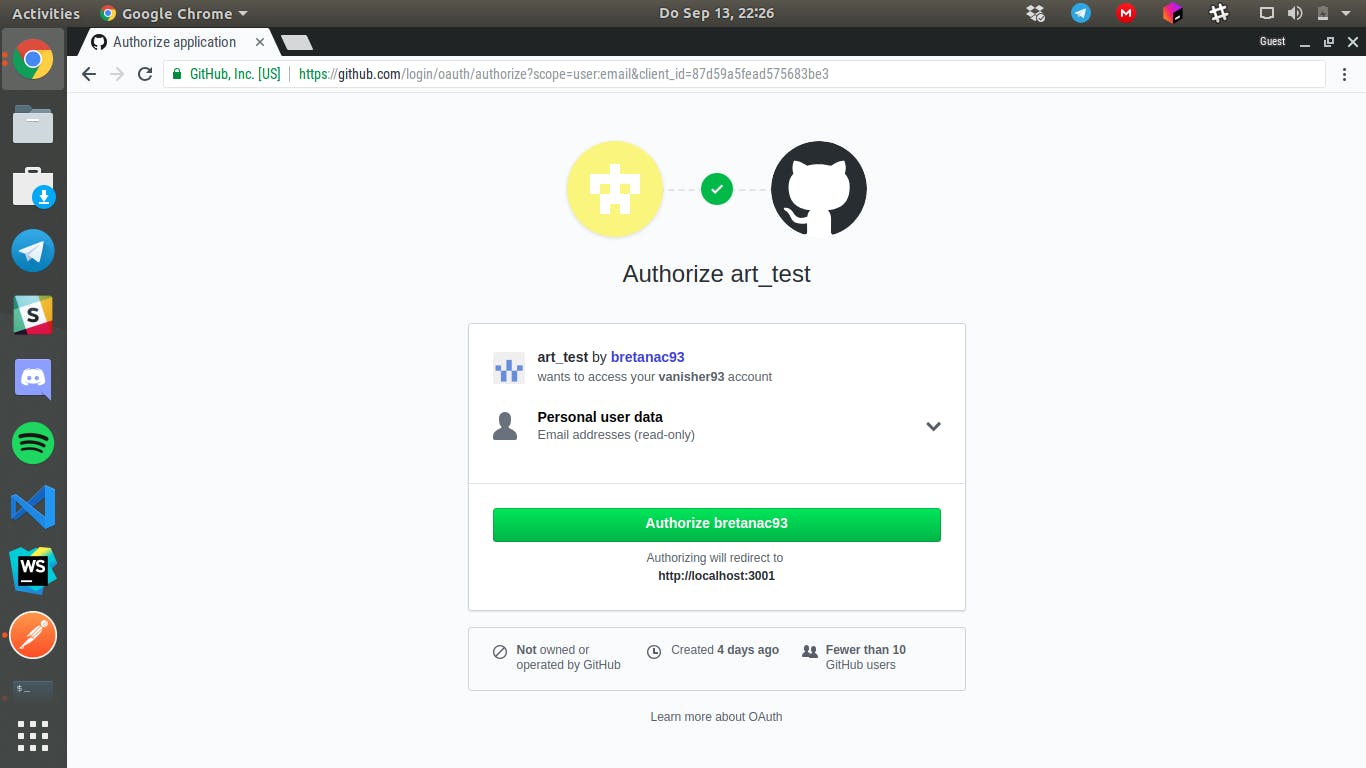
1 — The client makes a request to the OAuth provider (usually is when you see the page or window to grant authorization to the app requesting access to your data) i.e:
2 — When (and if) you grant access to your data in the provider, it generates an ephemeral access code (only 1 usage), with this code.
3 — The client sends the code to the server in the body of the request and the server forwards the request to the OAuth to validate the authentication.
4 — Once the OAuth provider checks the access code and verifies it’s indeed real, it responses to the server with a bearer token, which is used fir authenticating the requests to the API protected endpoints (like api/user).
5 — The server asks to the OAuth provider about the user data by sending the token in the header of the request.
6 — The last step is depending on the business logic of the application, is your decision if you want to forward the user data to the client and prefill a registration form or create the user straight away, I’ve seen this process in many shapes and colors, so, decide by yourself :)
I know, so far I’ve been writing a lot of theory, and I promised at the beginning I would not do that, but indeed is necessary to understand and get more familiar with the process in a wider picture, the next section is gonna be funnier, I promise.
Now, let’s start coding, for this tutorial I’ll be using NodeJS and Nuxt.js, but feel free to use the most comfortable tech stack for you. Please, don’t judge me for the following code, I’d put everything in one file because I’m more interested on the fact that you guys gets the idea than spending 1 hour explaining how I organized my code, so, for now, let’s keep it simple.
The code below shows our web server and main routes, let’s focus real quick on the most important parts:
require('dotenv').config(); // Loads the environment variables from .env files (comes really handy)
const express = require('express');
const cors = require('cors'); // Middleware for allowing requests from different origins
const bodyParser = require('body-parser');
const axios = require('axios'); // HTTP Client

const app = express();

app.use(cors());
app.use(bodyParser.urlencoded({extended: false}));
app.use(bodyParser.json());

app.get('/', (req, res) => res.send('Hello World'));

app.get('/auth/github', (req, res) => {
  const {code} = req.query;
  // The process starts by sending the auth_code obtained once the client
  // got access to the OAuth provider.
  axios.post('https://github.com/login/oauth/access_token', {
    client_id: process.env.GITHUB_CLIENT_ID, // The data for accessing Github app which I'm loading from env variables.
    client_secret: process.env.GITHUB_CLIENT_SECRET,
    code
  }, {
    headers: {
      'Accept': 'application/json'
    }
  }).then(resp => {
    const {access_token} = resp.data; // The bearer token which will allow our server to access protected resources of the API
    axios.get(`https://api.github.com/user?access_token=${access_token}`, { // Request user data and send it back to the client.
      headers: {
        'Accept': 'application/json'
      }
    }).then(resp => {
      console.log(resp);
      res.json(resp.data);
    }).catch(err => {
      console.log(err);
      res.send(err);
    })
  }).catch(err => {
    console.log(err);
    res.send(err)
  })
});

app.listen(3000, () => console.log("Server listening on port 3000"));
I left the explanations to the most important remarks in the code, otherwise would’ve been insane to say line number and what is it about :)
That’s it for this section, so far, we got the theory, we got the server, now we only need the client, and that’s for the next section.
We’ve ran a long path so far, but we still need a client that can handle the user interaction with our system, as I mentioned before, I’ll be using VueJS with Nuxt.js which is super easy to configure and get it up and running, I know not all of you knows this framework, but what I’m about to present is pretty similar at any other framework/library out there, don’t get scared, you will see:
<template>
  <section class="container">
    <a href="https://github.com/login/oauth/authorize?scope=user:email&client_id=87d59a5fead575683be3">Login with Github</a>
  </section>
</template>

<script>

export default {
  components: {
  },
  mounted() {
    const {code} = this.$route.query; // Retrieve the code provided by the OAuth provider
    if (code) {
      this.$axios.get(`http://localhost:3000/auth/github?code=${code}`) // Send it to your server
      .then((resp) => {
        console.log(resp.data); // Check your console :)
      })
      .catch((err) => {
        console.log(err);
      })
    }
  }
}
</script>
Once again, I left in the code all the explanations I thought of interest for you.
Here is what we have so far:

Nothing fancy right? :) , but makes the job and is more than enough for you to get the idea of how it works, now let’s get to the final section which is create the app in Github and retrieve the user information to the client.
Configuring an app in an OAuth provider is really straightforward, as we’ve been talking about Github the whole article we will stick to it until the end. The process is similar to all the others previously mentioned, the steps are the following: 1- Enter to https://github.com/settings/developers and click “Register new application”, this will redirect you to a page where you have to provide some input about the app you are creating.
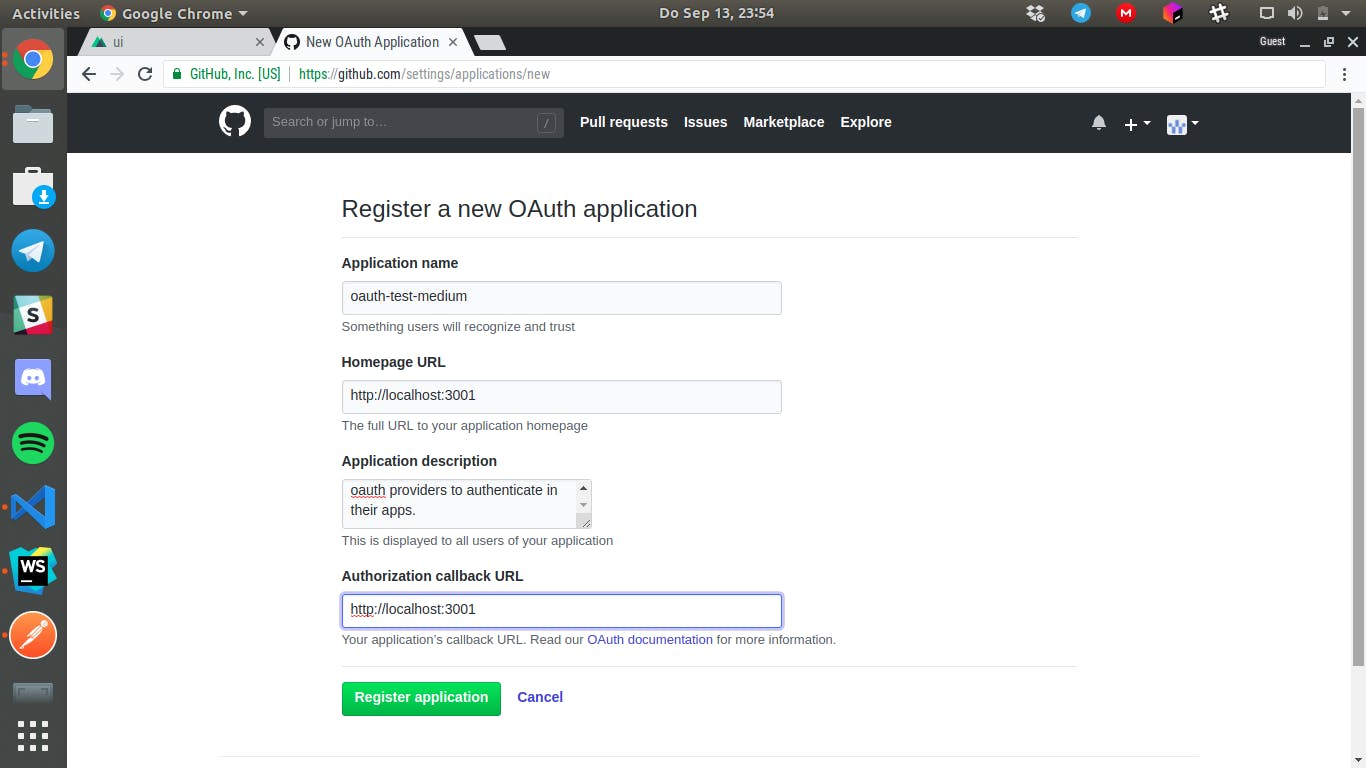
There is one field which is the most important in this form, I left it highlighted on the screenshot on purpose, is “Authorization callback URL”, basically is where Github is gonna send the auth_code once the user authorize the access to his personal data.
Once is created you will get something like this:

Of course once I publish this tutorial I will reset the tokens, so those are useless, don’t be lazy and create your own app, is not a big deal ;)
Only two more things and we finish, first of all, you need to set the tokens on the server in order this project to work, and secondly, you need to set the client_id in the url belonging to the button the users will use to start the auth flow, which is something like:
https://github.com/login/oauth/authorize?scope=user:email&client_id=356b757559647d2a3fba
Once you get all this configured, proceed to test and see the beautiful result in the console of your browser, if everything was well configured, once you click on the anchor containing the previous url, you will see something like this:

And if everything went fine (I hope is the case), once you authorize the access, you will see something like this in your browser console:
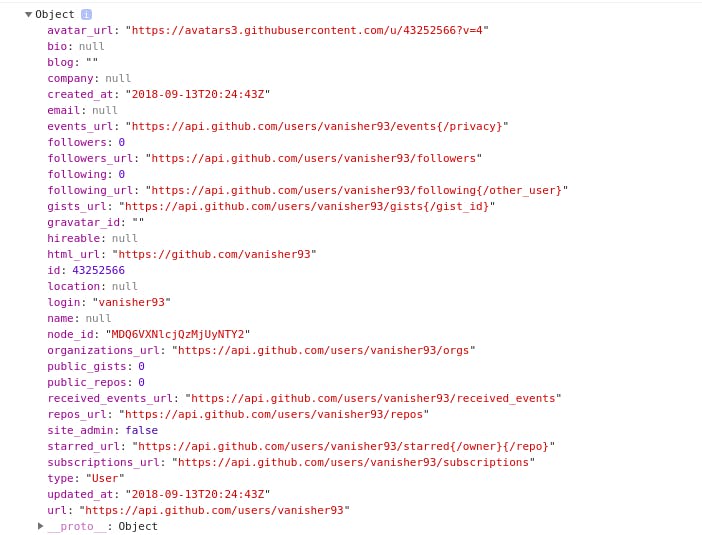
That’s the data retrieved by the server of your application from the OAuth provider, and from this point is where your business logic decides what are you going to do with this data.
That’s all folks, the source code for these two projects can be found on my Github account or by using the following links:
The frontend app: bretanac93/oauth-example-frontend Frontend for OAuth flow. Contribute to bretanac93/oauth-example-frontend development by creating an account on GitHub.github.com
The API: bretanac93/oauth-example-api OAuth example for Medium tutorial. Contribute to bretanac93/oauth-example-api development by creating an account on…github.com
Remember guys, this code is not to be used on production as a lot of optimization needs to be made before, this is only for learning purposes on how to use OAuth.
If you think this tutorial was good or useful for you in any way, show some love and clap, and if you would like me to make another article making something fancier like JWT Authentication on top of this flow, let me a comment and gladly I will dedicate some time to it.
Peace and love for everyone, hope you enjoyed :)